Showing posts with label cooking. Show all posts

Thursday, January 31, 2008

Tasteh Brussels Sprouts


Many people loathe brussels sprouts because they were force-fed them as a child or because they only know them as a gross, overcooked mess in their cafeteria lunch tray. And sadly, that is probably how most people will continue to encounter them since the vast majority of U.S. production winds up in the frozen section, where larger specimens are de rigeur.

But brussels sprouts really are delicious, and it is the sprouts that are too small to meet processed food standards that are the tastiest. Although all vegetables are better fresh, this is especially true of brussels sprouts. Fresh, they're nutty, sweet and meltingly tender. Once they've been sitting around for too long, they become flatulent and flabby-tasting. I cannot warn you away from most supermarket sprouts strenuously enough. They're usually too big, which means they'll have leathery, slightly bitter outer leaves; and packed into a plastic-covered tub that's been shipped however many miles it is to you from Monterey County, Ca, where most of the U.S. supply is grown.


So if you see them at the farmer's market, snap them up. They're quick and super-easy to cook. Here's how I cooked a batch I got from Phan's Farm at the Heart of the City Farmer's Market:

Simple Brussels Sprouts:

1/2 - 3/4 lb smallish brussels sprouts
1 pat butter
1 tsp salt

Cut the bases off the sprouts, then slice them in half. Set them face-down in a shallow frying pan and put enough water in the pan to cover them just over half way. Cover the pan and put over high flame. Once the water is boiling, add salt and lower heat to medium. Cook until tender, about 10 minutes. Drain and return to pan. Add 1 pat butter and swirl sprouts around in pan to coat. Done!

Thursday, January 10, 2008

Whoa!


Every now and again, my weekly stroll through the farmers market gets interrupted by a sighting of something extraordinary that makes me stop in my tracks and think, “holy shit!”. This week, it was yuzu.

Yuzu is something that I’d tasted all my life in a processed form, but had never had fresh. It’s in a lot of Japanese seasonings, most commonly the ponzu dipping sauce served with shabu-shabu and sashimi; and it’s apparently also commonly consumed in Korea in yuja-cha, a honey-laden tea meant to ward off the winter cold.

The ones I bought tasted basically like a cross between an orange (without the sweetness) and a lemon (but without the puckering sourness). A glance through Harold McGee indicated that yuzu is composed of a pretty considerable medley of flavor notes: limonene (citrus), pinene (pine), terpinene (herbaceous), linalool (flowery), sulfur (musky), terpenoids (spicy).

My parents used to impress upon me how hard it is to find fresh yuzu every time they’d crack open a bottle of Mitsukan ponzu (which doesn’t even have any real yuzu in it), so I was eager to snatch up a couple from De’Santis Bella Frutta and try them out. The first thing that struck me about them was their heady, perfumy scent. The second thing that struck me was, unfornately, how breathtakingly expensive they are - $20/lb (??!!). But my curiosity got the better of me and I bought them anyway.

Now, given that I’d now spent $18 on only a few fruits, I was determined to use every last bit of them. I sent two home to my parents, and then got to work on zesting the rest. The fresh bits of peel work very nicely in tsukemono, where they added a warm citrus undertone to an otherwise mundane batch of salt-pickled turnips. I dried the remainder of the zest for ginger-honey tea, which makes for a nice, cozy brew for the crumby, rainy weather we’ve been having of late. I reserved the juice (of which there wasn’t terribly much) and minced the rind to steep in about 2 cups of soy sauce for homemade ponzu - which is also a great accompaniment for tempura or fried fish in addition to shabu-shabu.

All in all, a decent purchase from my favorite fruit vendors at the Heart of the City Farmers Market (they also sell at the Sunday farmers market at the Civic Center in San Rafael). Can’t wait to see what surprises they’ll have in store next time around! In the meantime, I'll have to try some other yuzu recipes I've come across, like this pork cutlet with yuzu miso and shiso.

Wednesday, January 9, 2008

Is it cauliflower? Or broccoli?


I first came across this extraordinary-looking vegetable a couple of years ago at New York’s Union Square farmers market, attracted by its chartreuse hue and mesmerizing fractal pattern. A sign at the stand proclaimed it to be “romanesco cauliflower”. When I bought it this past week from the Capay Organic store at the Ferry Building, I was told it was a kind of broccoli. I’ve also seen it sold as Broccoli Romanesco, Roman broccoli and Broccoflower. According to Elizabeth Schneider’s exhaustive reference, “Vegetables from Amaranth to Zucchini”, the consensus among plant breeders is that it’s a kind of cauliflower.


Regardless of what branch of brassica oleracea it most closely hews to, it’s delicious. It tastes like cauliflower, but with a distinct, pleasing nutty quality and a nubbly texture that sets it apart from both broccoli and cauliflower.


I cooked mine two ways - I blanched a batch of it just to see what the unadulterated taste of it was like; and I slow-cooked it in a variation of a recipe from Alice Waters’ new book. While it is very pleasant lightly cooked on its own, slow-cooking it turned it soft and meltingly velvety, which was a nice surprise.

Here are 2 ideas for what to do with this broccoli/cauliflower/whatever next time you can’t resist buying it:

Blanched Romanesco Cauliflower:

Bring 4 c of water to a rolling boil. Snap all the stems off from the central stalk and set aside. Then, quarter the stem crosswise. Salt the water; toss in the cauliflower and cover. Cook 3 minutes, or up to 5 if you prefer the end result to be a bit more tender.


Slow-cooked Romanesco Cauliflower:

1 head romanesco cauliflower (about 1 1/2 lbs)
3 medium cloves garlic
3 tbsp olive oil
1 tsp bacon fat (optional)
1/2 c vegetable or chicken stock

Cut the cauliflower into 1/4 inch slices crosswise, then mince. Mince the garlic. Heat the olive oil and bacon fat (if you’re using it) in a heavy-bottomed pan and sautee the garlic lightly. Add the cauliflower, stir to coat in oil, add stock, reduce heat to low and cover. Cook for 45 minutes, stirring occasionally and adding more liquid as necessary. Salt to taste.

This makes a really nice omelette stuffing, and is also great over angel hair pasta with bits of bacon or prosciutto.

Tuesday, January 8, 2008

Even more Japanese food


From top, clockwise: miso-pickled turnip greens, broiled salmon skin, stewed pumpkin, kinpira, Hakurei turnip pickles

As my last few posts attest, I've been on a bit of a Japanese food bender these days. Around New Year's, I start to feel a little homesick for my parents' cooking and start making things that I used to wish would disappear or turn into pizza when I was a kid. I started to have a hankering for the kind of foods my mom will often cook in big batches on Sunday to have for breakfast through the week, and the results were quite satisfactory.
Here are a couple of recipes:

Kinpira:
This dish is usually made either with burdock root or carrots (not both), but I like the combination of the two together plus a handful of hijiki seaweed.

1/2 lb burdock root
1/2 lb carrots
1/2 cup dried hijiki seaweed
sesame oil
soy sauce
2 tsp brown sugar, molasses or maple syrup

Peel and slice burdock into matchsticks (about 3 inches long and 1/2 cm wide) and set in a bowl of cold water + 1 tblsp vinegar. This is to keep the burdock from discoloring. Peel and slice carrots in the same way. Submerge hijiki in cold water; drain when softened and about quadrupled in size.

Heat one tbsp of sesame oil in a frying pan. Add chopped burdock root and carrots, plus about 2 tbsp of soy sauce (or less, if you like your food less salty). Stir-fry about 3 minutes, then sprinkle brown sugar/molasses/maple syrup over the vegetables and add the drained hijiki. Stir-fry another 10 minutes. Done!


Stewed pumpkin:
For this batch, I used a small Jarrahdale pumpkin I got from Paradise Valley Produce the last time I visited. The standard squash to use is some sort of kabocha, which is sweeter and starchier than the Jarrahdale, which is somewhat bland but has a moister, more yam-like texture.

1 3lb winter squash or pumpkin (not a Sugar Pie or Cinderella, as these will not hold up in the stewing pot)
2 cups dashi or fish stock
1/4 c soy sauce
1 inch-long piece of fresh ginger, peeled and sliced thinly crosswise
brown sugar/molasses/maple syrup to taste
3 tbsp sake

Cut the squash in half and scoop out the seeds and veins, then slice lengthwise into 1/2 inch crescents lengthwise. Heat dashi together with the ginger slices until it reaches a slow boil. Mix in the soy sauce, sweetener (I say "to taste" b/c the sweetness of this dish can vary very widely) and the sake. Then, add the squash slices and turn heat down to a simmer. Simmer about 40 minutes, or until the squash is soft all the way through.

Note: I'm a little alarmed to find that health warnings have been issued in a number of countries (the U.K., New Zealand, Canada and Hong Kong) advising people to avoid consumption of hijiki due to high arsenic levels. Not quite sure what to make of it - I've been eating it all my life and I'm not dead yet; on the other hand, the same could be said of a lot of things that aren't healthy. Decide for yourself. Kinpira is just as good without it and I certainly don't want to be accused to poisoning anyone with Japanese food!

Friday, January 4, 2008

Eating weeds - and other unexpectedly tasty stuff

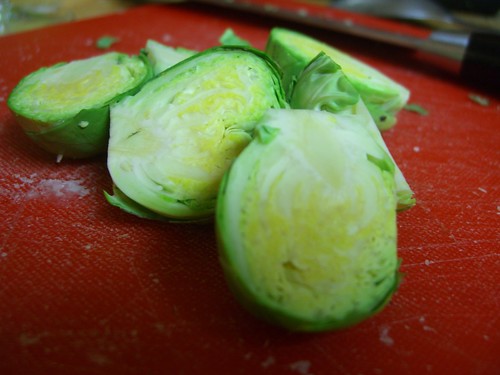
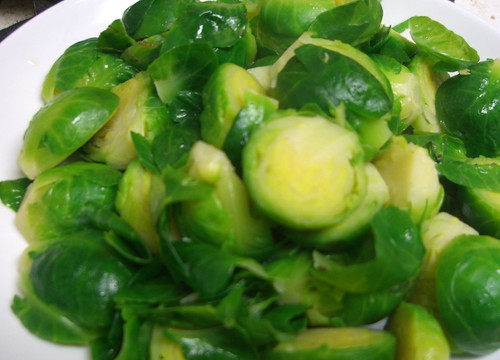
I love finding unusual vegetables and thinking of ways to cook them.

A jaunt up to the farm just before Christmas yielded a huge bounty of wild radish greens, which is both of one my favorite vegetables and also something I’ve never seen in a store or a farmers market, most likely because it’s a weed. It sprouts like crazy throughout the year, especially as it gets colder. If you have a garden, or have strolled through an area farm, you’ve probably seen it - it grows to about 3 feet and has little pinwheel flowers that are generally either yellow, white or lavender.


The plant looks very much like a taller, spindlier version of broccoli raab, which it also closely resembles in taste. It quickly grows tough and fibrous, so it has to be harvested when the tips are still young and tender, ideally before the flower opens and the inflorescence is just emerging from the stalk. I felt very lucky indeed to coincidentally be on the farm when this prolific weed was just entering the phase when it’s ideal for picking.

There are a couple of ways to cook it. It’s got a one-two punch of brazen mustardy bite plus an undertone of bitterness, which I think gives it character, but which could be off-putting to people who prefer their vegetables to be more demure. So a good way to temper it is to make tempura with it - this brings out the tender snap of the stalk, crisps the leaves and mellows the bitterness.

Another method is to stir-fry at high heat with a prodigious amount of toasted sesame oil, a dash of maple syrup or brown sugar, and about 1 tablespoon of soy sauce per pound.

A more traditional way to cook it is to use it in oshitashi - some recipes call for things like mirin, sake or sesame of some sort, but I like to just splash some soy sauce on it with a handful of katsuo flakes and call it ready. This is the plainest preparation of the green, one which doesn’t mask the bitter spiciness of the vegetable, and one that goes especially well with a nice rich fish accompaniment like the one below.


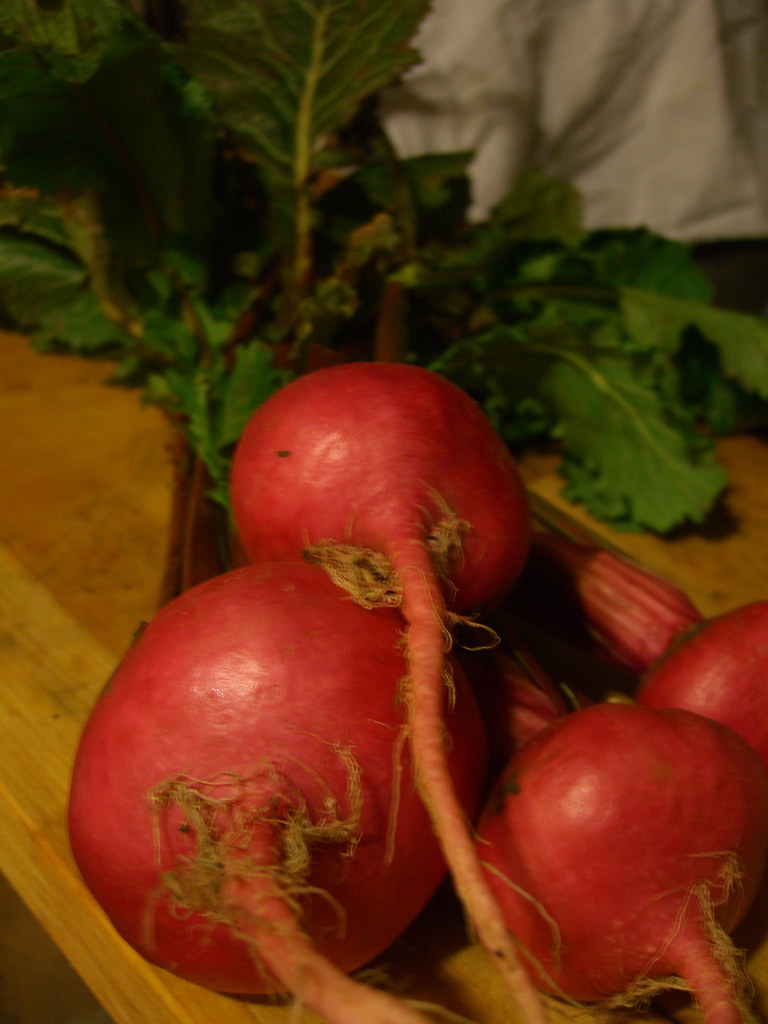
I was also delighted to come across some Scarlet Queen turnips at the Ferry Plaza Farmer’s Market at the Eatwell Farms stand. I think it’s a shame that turnips are generally either neglected or reviled in American food because they require so little preparation to bring out their juicy sweetness. They’re best when they’re on the smaller side (i.e., not too much larger than golf-ball sized), as fresh as possible and not too mature. Sometimes you get turnips that have been sitting around in the ground for too long, and the mellow tenderness that make them so delicious has dissipated into a searing, nose-clearing mustardy taste.

My father used to have a batch of 
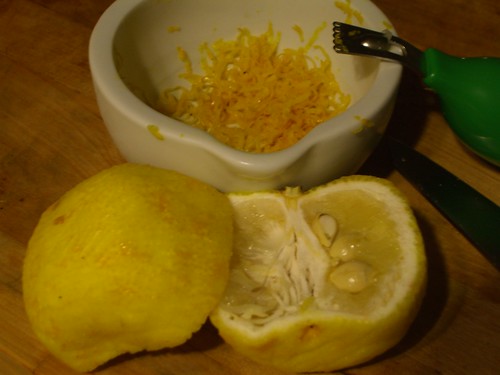
turnip pickles going whenever they were in season, and it’s nice to have the opportunity to replicate that out here. These turnips were especially nice because their festive reddish-pink blush added a bit of cheer to what’s otherwise a relatively drab-looking vegetable. I cut them into thin, half-moon slivers and layered them in a glass dish with a bit of yuzu peel, salt and kombu. Then I put some plastic wrap over them, weighted them down with a jug of water and waited an hour. I also pickled the greens in a similar fashion, but replaced the salt with light miso and added a tsp each of sake and mirin. Add some rice, miso soup and a protein of some sort and you've got a meal!


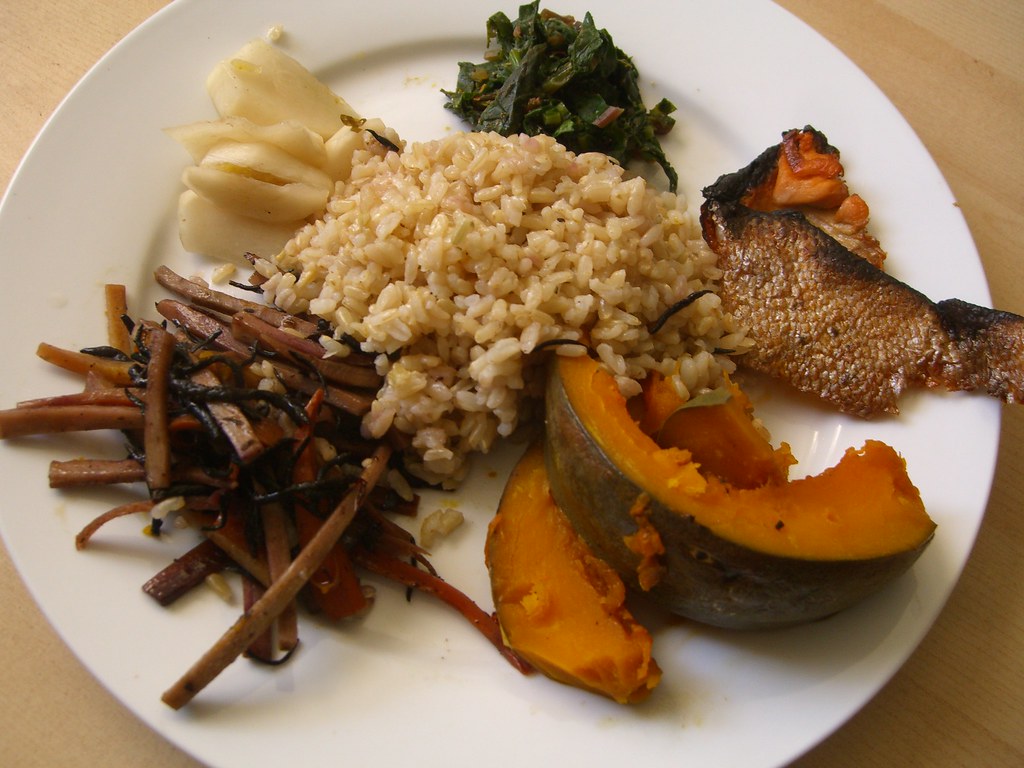
Clockwise, from top: hijiki brown rice, wild radish green oshitashi, pickled turnips w/ sesame oil, miso-pickled turnip greens, miso soup, sauteed wild radish greens, fried sand dabs

Monday, December 10, 2007

Sometimes you just need a little comfort food

Which, for me, is this kind of thing:

Broiled mackerel with grated daikon, miso soup, brown rice w/ stir-fried hijiki and parboiled green beans with sesame seeds

That’s pretty much the sort of thing my mom always made at home - some kind of broiled fish, very simply prepared vegetables, miso soup and rice with a couple of rotating accompaniments like salt pickled turnips, sauteed lotus root, burdock kinpira, or stewed chicken.

I realize that probably sounds kind of weird, and certainly, it used to be a source of tremendous consternation to me that my mom never made me any “normal” food. This was especially true at lunchtime in elementary school, when everyone would take out their lunch boxes and start trading things like strawberry Fruit Roll-Ups and juice boxes feverishly.

Now that I’m older and don’t live at home, I get a hankering for that food every now and again, and thankfully, it’s really easy to make. I think some people find the idea of cooking Japanese food at home kind of intimidating because of all the unfamiliar ingredients, and the cultivated esotericism of the typical unsmiling sushi chefs encountered in Japanese restaurants. But it isn’t difficult to make a straightforward meal like the one pictured above:

Parboiled green beans with sesame seeds:

  • Cut the tips off a quarter pound of green beans
  • Drop beans into water that has reached a rolling boil; cook 2 minutes, or until the beans have about the give of the flesh on the tip of your index finger.
  • Remove from heat and plunge into ice water. Drain.
  • Dress with a dash of sesame oil and a sprinkling of sesame seeds - or just a dab of mayonnaise.

Hijiki stir- fry:

  • Submerge 1/2 cup of hijiki in cold water, set aside until it expands to about 3 times the original size; drain
  • Peel and quarter a carrot lengthwise; cut into thin, fan-shaped slices
  • Sautee the carrot slices in 2 tbsp sesame oil until semi-soft
  • Add the drained hijiki and continue stir-frying for about 5 minutes, adding 1 tsp brown sugar and 1 tbsp soy sauce (you can adjust to taste - I prefer less sugar than some people)

Broiled mackerel:

  • Set oven to broil
  • If using a whole mackerel, slit the fish from the tip of the jaw down the belly to the tail; scoop the innards out (Or just leave them, if you don’t mind fish innards. I find them kind of bitter.) Rinse and pat dry. Make two cuts on either side of the head to splay the body open like a book.
  • Salt lightly, then brush with any kind of cooking oil you want - safflower, soybean oil, sunflower, sesame, whatever.
  • Broil with cut side facing up for about 10 minutes, or until the meat on the inside browns - keep a careful eye on the fish so it doesn’t burn
  • Serve w/ finely grated daikon radish and a spot of soy sauce

I usually just cook my rice in a rice cooker, so I can turn it on and ignore it while I’m making everything else. Easy-peasy!

Monday, November 5, 2007

More winter squash!

Delicatas are probably my favorite kind of winter squash. They have the perfect texture, aren't too moist or too dry and have a deliriously sweet taste that goes well with all things winter. The standard way of cooking them is to simply cut them in half, brush them with olive oil and then bake them until soft - at which point you can gobble the whole thing down, skin and all.


But that would be so easy. It wouldn't require hours of baking, boiling, pureeing, fussing and mess-making in the kitchen. So I decided to try making delicata gnocchi. Now, I love gnocchi, but I absolutely hate it when they're too heavy and you feel like you have a leaden torpedo of dough in your stomach from eating them. Here's what went into the dough:

The meat from 4 roasted, seeded delicata squash and 3 baked russet potatoes
3/4 cup all-purpose flour
3 eggs

Instead of adding flour to the dough until it became manageable enough to roll out and cut into pieces, I just left it as it was and used a spoon and a pastry spatula to spoon the dough up, divide it and drop it straight into boiling water. This I served with fennel sauce:

3 fennel bulbs, browned in a covered pan with 2 tbsp olive oil
blended with
1 cup milk
1 cup grated parmesan cheese

I reserved some fronds off the fennel to mince and toss on top for an extra anise-y kick. As you can see, it wasn't the most elegant meal, but it was damn tasty.

Wednesday, October 31, 2007

Nouveau caveman food


My boyfriend picked up Jennifer McLagan's excellent Bones: Recipes, History and Lore a little while back and the cover photo of a couple roasted marrow bones, complete with parsley salad and marrow spoon had been taunting me from the kitchen table ever since.

While it is now terribly in vogue among a certain kind of gourmand to seek out the funkiest of meats ("duck fries", i.e. duck balls, from Incanto anyone?), I haven't laid a finger on anything more adventurous than chicken liver in ages. So we picked up some marrow bones from Drewes', determined to give it a shot, and cooked them up the other night after a lengthy stay entombed in the freezer.

It turns out that they're extremely easy to cook, but just require a little planning. Marrow bones must be soaked for 12-24 hours in a few changes of water to leech all the blood out of them. I'm not sure what would happen if you skipped this step, but I wasn't going to take any chances. Who knows what old, mouldering blood trapped in a cow leg tastes like. Here's what they looked like when they came out of the water bath, pale and bit ghostly:


You'd think that after having to soak the bones for ages, cooking them would also be a production. But it wasn't. It took about 15 minutes in the oven at 450 for them to cook through - although in all honesty, we left them in for a little too long and the marrow started to actually melt and flood out of the bottom of the bones. So I'd recommend checking on them periodically and pulling them when you can put a toothpick into the center w/ no resistance.

Marrow is tremendously rich - it tastes kind of like a steak distilled into butter that's made out of beef - so it's a good idea to have some bread and something sharp and peppery or mellow and sweet to eat with it. We ate ours with rounds of toast, an arugula-fennel salad and roasted beet soup to cut through the fattiness.

And not to sound like a broken record here, but I'd also like to point out that bones are just about the cheapest thing you can get from your local purveyor of pastured beef. Some meat CSA's even toss them in for free with your meat share. Of course, with all the high-end restaurants clamoring for them as well, that may not be true in San Francisco or New York.

Wednesday, October 24, 2007

Adventures with winter squash

It's winter squash season!!!! There are SO MANY delicious kinds of winter squash and so many ways to cook them that it's almost overwhelming. Almost enough, even, to not rue the fact that if you live anywhere other than California, that's pretty much all you're going to get at the farmer's market until next May.

Heat, Bill Buford's book about his Italian cooking journey from Babbo in New York to the Tuscan countryside, filled my head with delusions of hand-rolled pasta and thoughts of a plate of pumpkin ravioli with radicchio sauce I had in Florence over 10 years ago. Which is an insane and thoroughly unrealistic standard to set. I mean, I'm Asian. I'm not some fleshsome Italian grandma who's been pressing pasta w/ her orecchiete thumb since birth.


But I'd shlepped 4 orange kabochas down from the farm and I figured I'd give ravioli a shot. Now, in Heat, there is a brief mention of some recipe for ravioli di zucca in which the squash is grated and then stewed in milk. This is intriguing because it seems gratuitously fiddly. Winter squash is great because all you have to do is cut it in half, brush it with oil and throw it in the oven. And you can even skip the oil part if you're feeling really lazy. So why on earth would you make the process so painstaking?

Needless to say, I just couldn't bring myself to muscle down in front of the grater for hours and shred my own fingers into the ravioli filling. Instead, I halved each squash, removed the seeds and then baked them semi-submerged in milk at 350 - just because I had some sitting around in the fridge and thought, what the hell. Once the squash was baked through (about 45 mins), I scooped the innards out, added 1 1/2 cups of grated parmesan, a dash of salt and nutmeg and mixed it all together.


I rolled my pasta out, cut it into 2x2 squares and put about half a tablespoon of filling in. Then, while the ravioli were cooking, I minced some leeks, shredded up some chard and sauteed the lot in butter.

Tada! Ravioli. Not pretty, not perfect and definitely not the way the Tuscan mountain people make it, but not too shabby. Even if I did cheat and add what is probably a sacrilegious amount of olive oil into the dough so it would behave.


Can't wait to use the leftover filling in a sauce...

Monday, October 15, 2007

Do not fear beef. It is your friend.


The stove is well-loved, *not* just dirty, all right?

OK, so admittedly, that is not a picture of beef. Instead, it's a picture of the first step in the long process of beef stew and ultimately, beef stroganoff. I picked up a gorgeous chuck roast from Marin Sun Farms over the weekend and wanted to try slow-cooking it instead of just browning it, shoving it in the oven and eating it rare, which is what I usually do.

So the first step was making a decent vegetable stock to stew it in. I love making vegetable stock because it's an opportunity to take all the stuff you'd normally discard (or compost, for that matter) and turn it into something tasty. I've found that as long as you have the basics in there - carrots, celery and onions or leeks - it doesn't matter what else you add as long as there is a great heaping pile of vegetable matter and you cook the living hell out of it. This one had the aforementioned basics, plus leek tops, cranberry and fava bean shells, kohlrabi peels and tops, beet stems and peels, chard stalks and onion skins. Basically, you throw it all in your stockpot and then add water to about an inch or so above the pile and let it simmer for a couple of hours. For some reason, it seems as though something magical happens at about the 2 1/2 hour mark - the liquid goes from having an inchoate watery-green taste and develops a deep, rich vegetable flavor. Here's what you end up with after about 4 hours of cooking:


I strained all the spent vegetable matter through a sieve and discarded it, having yielded about 5 quarts of stock from a pile of stuff most people would normally toss.

Next, I put my chuck roast, two medium-sized onions and 6 cloves of garlic into a stew pot and filled it with vegetable stock and about 2 cups of red wine. When I opened the package of beef up, it looked and smelled like a rosy, delicious meat-gasm. Here it is, uncooked, in the pot:


BEEF, up close and personal

After about 3 hours of simmering, the meat was fall-apart tender and the cooking liquid was just redolent of beefy goodness. I let it cool over night, stuck it in the fridge and when I took it out the next evening to prepare, a thin layer of fat had solidified at the top. This I cracked off and mixed with some flour to make a sauce thickener. When it was reheated, I added quartered potatoes and a small red cabbage, also quartered, to cook in the stew juices. I know it must seem insane to spend 7 hours cooking one meal, but the thing to remember is that most of that time is spent sitting around, doing other stuff and popping over to the stove occasionally to stir.


Of course, there were leftovers. I turned those into beef stroganoff, which is a really easy way to use up beef leftovers. It basically involved shredding the beef, reheating it in the stewing liquid and then adding some sour cream and dijon mustard to taste, and then serving it over egg noodles. It made me feel triumphant in a 1950's home-ec kind of way to transform my two-day old chuck roast like this.

I'd also like to add that this whole rigamarole is probably the most economical way to enjoy grass-fed beef, since chuck roast is one of the cheaper cuts you can get other than hamburger, which sells out more quickly. I totally understand the sticker shock that comes with sustainably raised/natural/organic/grass-fed etc. meats, but do not freak out and go buy feedlot beef from Safeway instead ("Rancher's Reserve", my ass)!!! Just get a brisket or a chuck roast and you'll be good for a while. This one yielded 6 meals.

Wednesday, September 12, 2007

This could be you


You know you've done this yourself a couple times. You know, gone to the farmer's market, seen all the amazing stuffs and bought everything in sight. Today, I went to the Heart of the City Farmer's Market and loaded up.

This market gets poo-pooed a lot because it isn't as fancy-schmancy as the Ferry Plaza one or because not everyone there is organic (gasp!), but it's still great. Lots of Asian farmers selling all different kinds of eggplant, bitter melon, okra and an unbelievable variety of unusual greens like sweet potato leaf, water spinach and what looked to me like cucumber leaves. Where else can you get local, ORGANIC ginger??? Or fresh young jicama with the beans still attached (as opposed to the enormous, more mature jicama usually spied at Asian and Latino markets)? OK, OK, so those two particular examples are from farms growing around Fresno, which is almost 200 mi from San Francisco. But that's still a lot closer than China or Hawaii, which is where most of the ginger you see around here is from.
Plus, De'Santis Bella Frutta sells here. I'll have to muster up the courage to talk more with them, but they're Italian and grow all kinds of very unusual and unusually delicious fruits - sweet lemons, kaffir limes, buddha's hand citron, moscato grapes and AMAZING figs. You'll also find the best tomato deals around at this market. I don't usually like to tout how cheap food is (give the farmers a break! they work really hard!), but there's an unbelievable profusion of heirloom tomatoes and cherry tomatoes to be had at this market. I got 2 pounds of mixed sungold cherry tomatoes for $3.00 from a Chinese vendor towards the edge of the market and $2.00/lb dry-farmed Early Girl tomatoes. Can't beat that.


Here's today's haul: eggplants, peppers, the aforementioned moscato grapes, romanesco cauliflower, english peas, armenian cukes, romano beans, fava beans and glorious, glorious tomatoes.


OK, so it doesn't take a goddamn genius to come up with a salad (tomatoes, cukes and blanched romano beans). But it was good anyway.


Romesco cauliflower stew with cherry tomatoes, fava beans and chicken over brown rice!
There was quite a bit left over, but this dish worked nicely over pasta two days later. I separated out the chicken and shredded it, took the vegetables and all the liquid and pureed it with a bit of sour cream and asiago cheese. Voila! A totally different dish.